
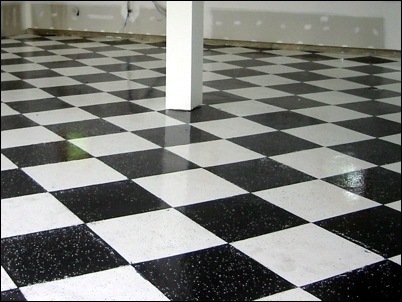
Take the winner's flag with a checkerboard garage floor
Your project will start by measuring the floor’s length and width. Then decide on the size and color of the squares that you want. 24″ x 24″ squares will be less work than 12″ x 12″ and will not give that tile look. The color can be traditional black and white, but if you have a blue car, dark blue might be the better choice. Of course, if you’re going to do the work to achieve a custom checkerboard floor, you want it to last. As with that car finish, we all know that it is preparation, preparation, and preparation that make the difference between a good job and a great one.
Ever notice how when you walk across concrete in your socks, the socks are all dusty when you finish? That’s because concrete continuously deteriorates and breaks apart leaving the floor dusty like your socks. A few drips of oil on concrete might be seen years later as the oil soaks into porous concrete. But if you seal the floor with an epoxy coating that adheres well, you can just wipe off oil, gas, and dirt with a rag. You can hose out, and squeegee that garage floor to a clean shiny surface in minutes.
Your prep should include a high alkaline cleaner applied using a rotary scrubber and a black pad or stiff Nilo grit type concrete brush. Next, you want to apply a high alkaline degreaser to bring the pH of the floor up to nearly 12, thus removing the leftover adhesive and contaminants. Then you shock the concrete and contaminants into letting go by switching to scrubbing with an acidic cleaner with water softeners, detergents, and rinse agents that jolt the floor with a pH of 3.5. This jump in pH will force contaminants and vulnerable cement particles to release from the floor. The acidic cleaner also opens the floor up to allow the epoxy top coat to create a strong long lasting bond.
Then use scrub rinses to make sure the chemical reaction has stopped and the floor is ready to start accepting repairs. You can fill hairline cracks and other minor imperfections with the grout provided by Durall Industrial Flooring. Mix the grout with water to a peanut butter consistency and, with a gloved hand, smooth it into cracks and joints to create a bridge for the epoxy coating. Larger holes can be filled with 100% solid epoxy and ground smooth with a missionary wheel before the final coat.
The first painting step should be to coat the entire floor with two coats of your light color. Be sure to wait 12 hours between coats. Do some screening after the first coat to be sure that dirt, bugs, and drips are shaved flat. Next pull a chalk line diagonally through the widest part of your floor to set your pattern. The lay down any size template squares side by side in two rows along the chalk line, and remove every other one. Using blue tape, place paper, cut one inch smaller than your templates, in the open squares. Tape the paper masking down with blue tape and move on. Once complete, you just walk on the paper and use a roller and brush to fill in the open squares. Note that for best results, brush from the tape towards the center to avoid getting epoxy leaking under your tape. One coat of your dark color should be sufficient. After you have filled in all the open squares with your dark color, be sure to remove the tape and masking paper. You don’t want to glue the tape to the floor.
Durall Industrial Flooring supplies kits of materials including checkerboard templates in 24″ x 24″ that are customized to owner specifications and delivered directly to the job site. Kits include full directions and 24/7 help lines are staffed by seasoned flooring experts, so professionals and amateurs alike can successfully install a quality floor.
For more information, contact Chris Biesanz at chris@durallmfg.com or phone 1-800-466-8910 or 952-888-1488 (24/7).
Our Customers


Address: 9655 Newton Ave. South | Bloomington MN 55431
Phone: 952-888-1488